Landing Board
A landing board is definitely an optional extra. Due to their extremely light weight and the ele** by which bees hold to surfaces, they are well able to alight on a vertical surface and walk around on it as necessary.
However, having kept bees in hives without landing boards for several years, we decided to introduce landing boards mainly for the extra pleasure afforded to us to watch the bees for longer as they walk around outside of the hive esp. on sunny days.
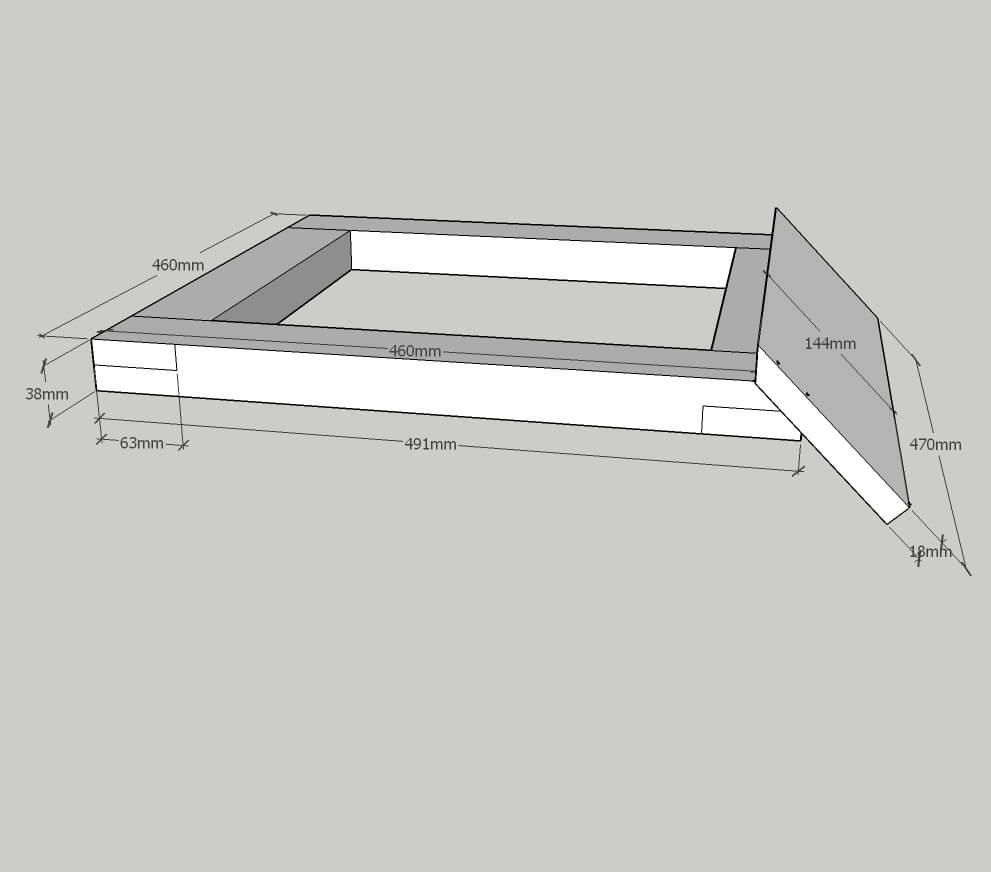
I figured that the easiest way to introduce this board as an upgrade to existing hives was to make a standalone frame with the board attached to the front. The hive is then simply lifted and the frame inserted under it bringing the board up against the hive front below the entrance.
- Parts List
| Part | No per hive | Notes |
| Sides | 2 | 38mm x 63mm CLS timber cut in length to the hive width (460mm) PLUS 31MM |
| Ends | 2 | 38mm x 63mm CLS timber cut in length to the hive width (460mm) |
| Landing Board | 1 | 144mm x 18mm planed timber cut in length to hive width PLUS 10MM |
- Assembly
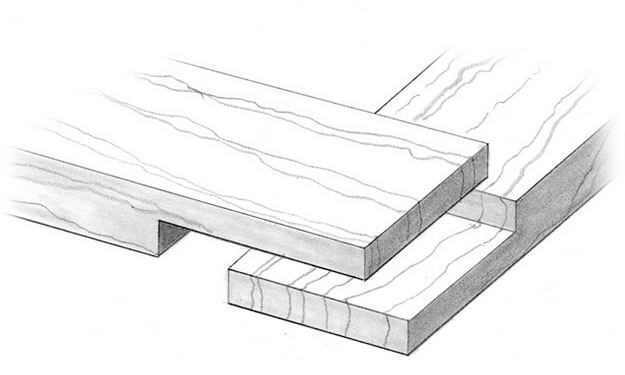
All 4 sides can be cut from a single length of 2400mm timber http://www.wickes.co.uk/Wickes-Studwork-%28Cls%29-38-x-63-x-2400mm-Single/p/107177 I jointed the ends with half lap joints such that the wider face would be on top and bottom, glued and screwed from underneath.
After the frame had dried, remove the screws on the front 2 corners to avoid accidents in cutting the angle! Draw a line across the front frame 460mm from the back edge (this should run down the centre of the front frame top surface.) Cut through the front frame at a 45 degree angle along this line to the front bottom edge of the frame. This is the face to which the Landing Board will be glued.
Cut an angle of 45 degrees on one edge of the Landing Board and glue it to the front sloping face of the frame such that the angled edge of the Landing Board runs vertically up from the line drawn above and there is a 5mm overlap down both edges (to shield edge from rain).
Screw the Landing Board to the frame (I did it from below as I didn't want to leave vulnerable points for the weather to attack). Finally paint with three coats of external grade paint.
